PayTraq
Last updated July 16, 2026
Connect CostPocket to PayTraq by activating PayTraq's Inbox channel and entering its email address in CostPocket. Digitised documents then arrive in PayTraq > Purchases > Purchase Inbox > Inbox. Learn more about PayTraq.
Before you begin
Set up your CostPocket account first: Registration, Join a company, or Add a company.
Connect the integration
In PayTraq, go to Purchases > Purchase Inbox > Channels, activate the PayTraq Inbox channel, and copy its email address.
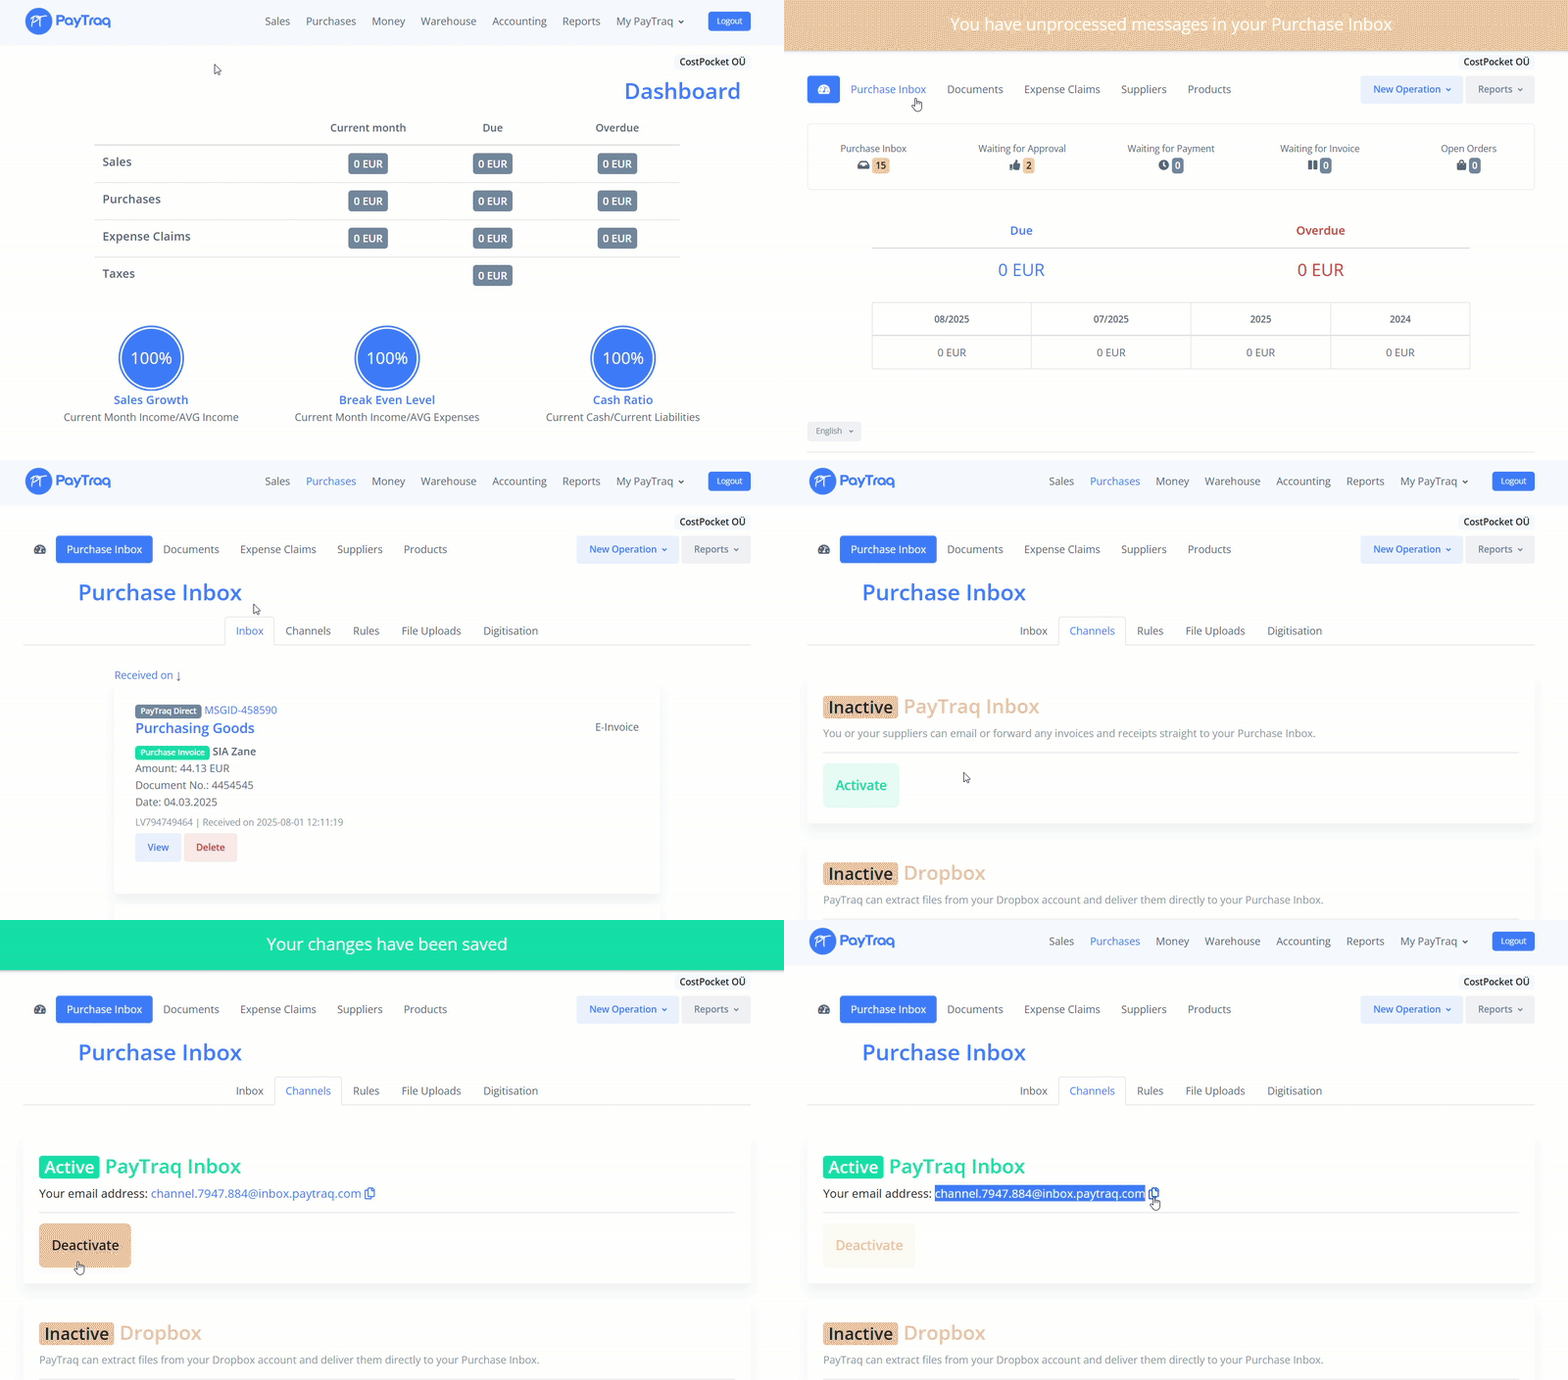
In CostPocket, go to Settings > Accounting software integration > PayTraq, enter the PayTraq inbox email address, and click Next.
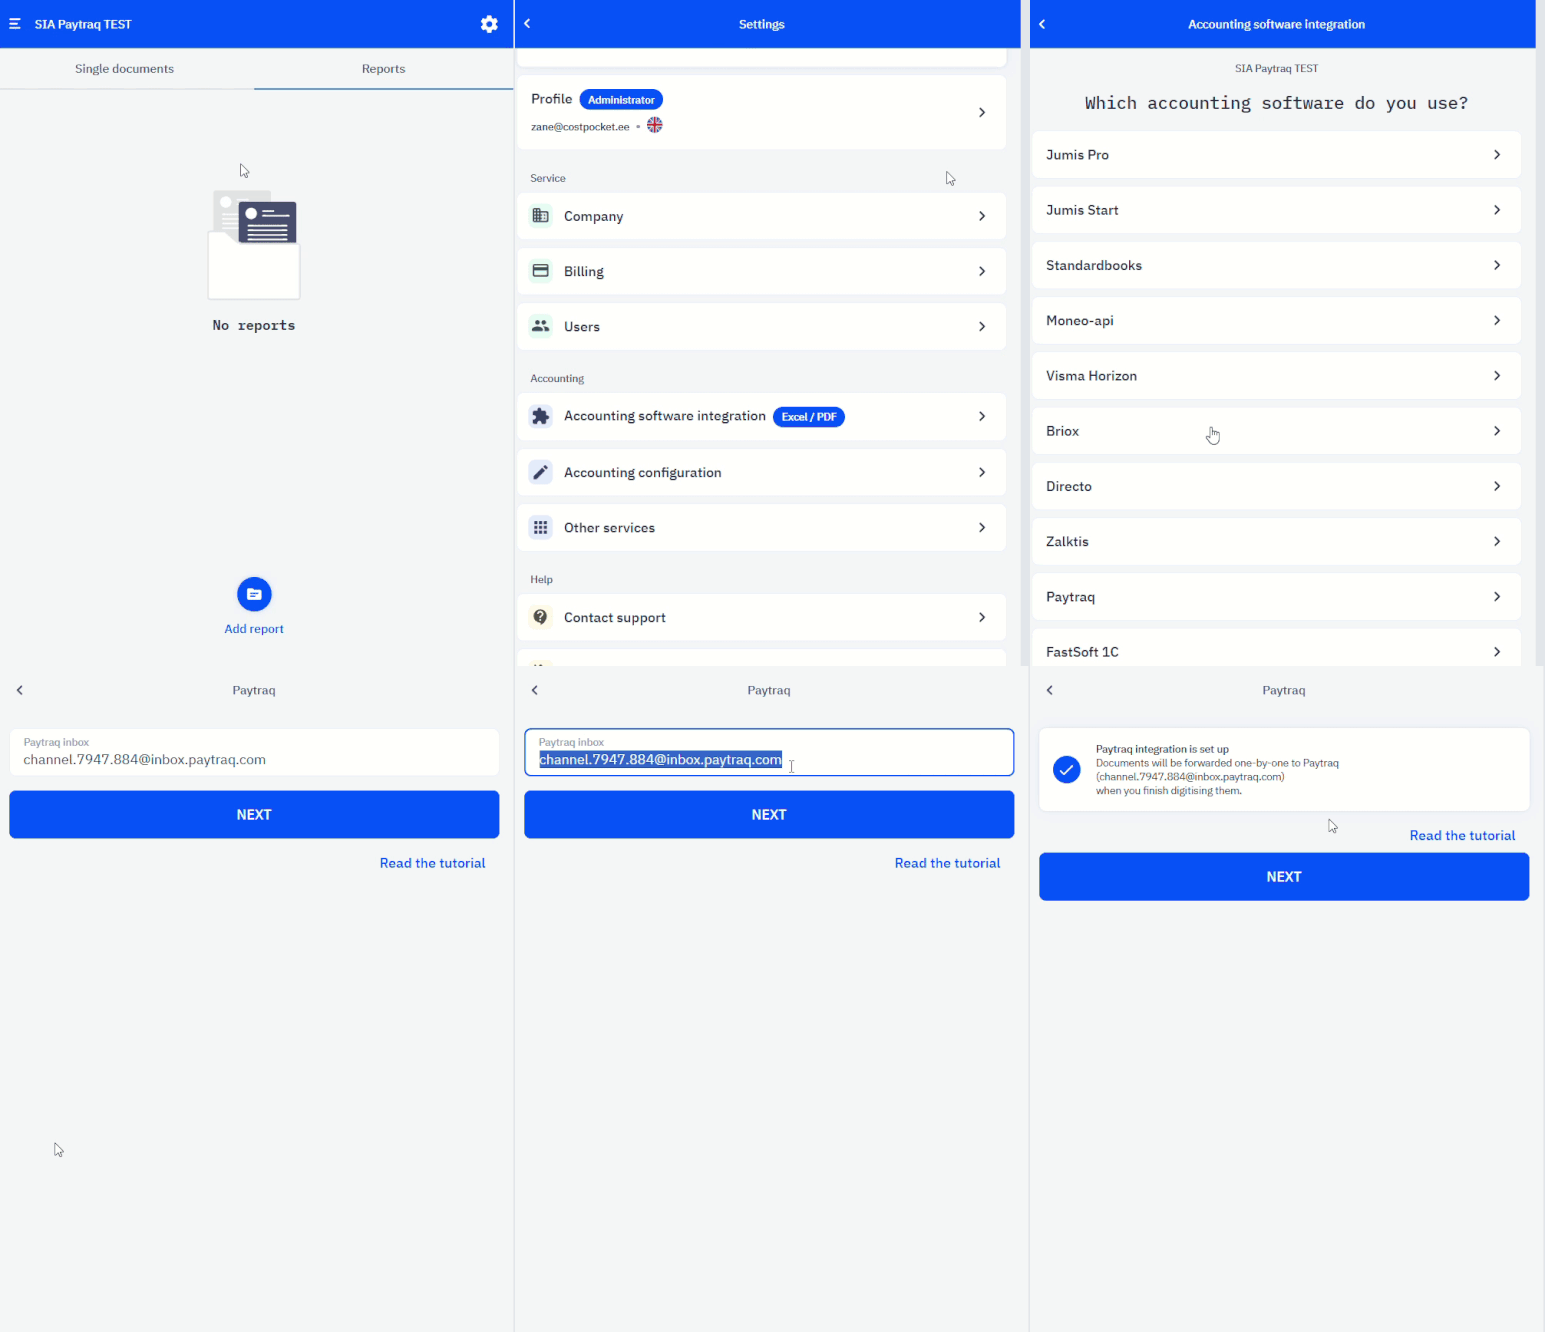
How documents flow to PayTraq
Send documents one by one (invoices) or as expense and travel reports:
- How to submit receipts and invoices
- Submitting expense, travel, and mileage reports
- Submit documents by email
Where to find documents in PayTraq
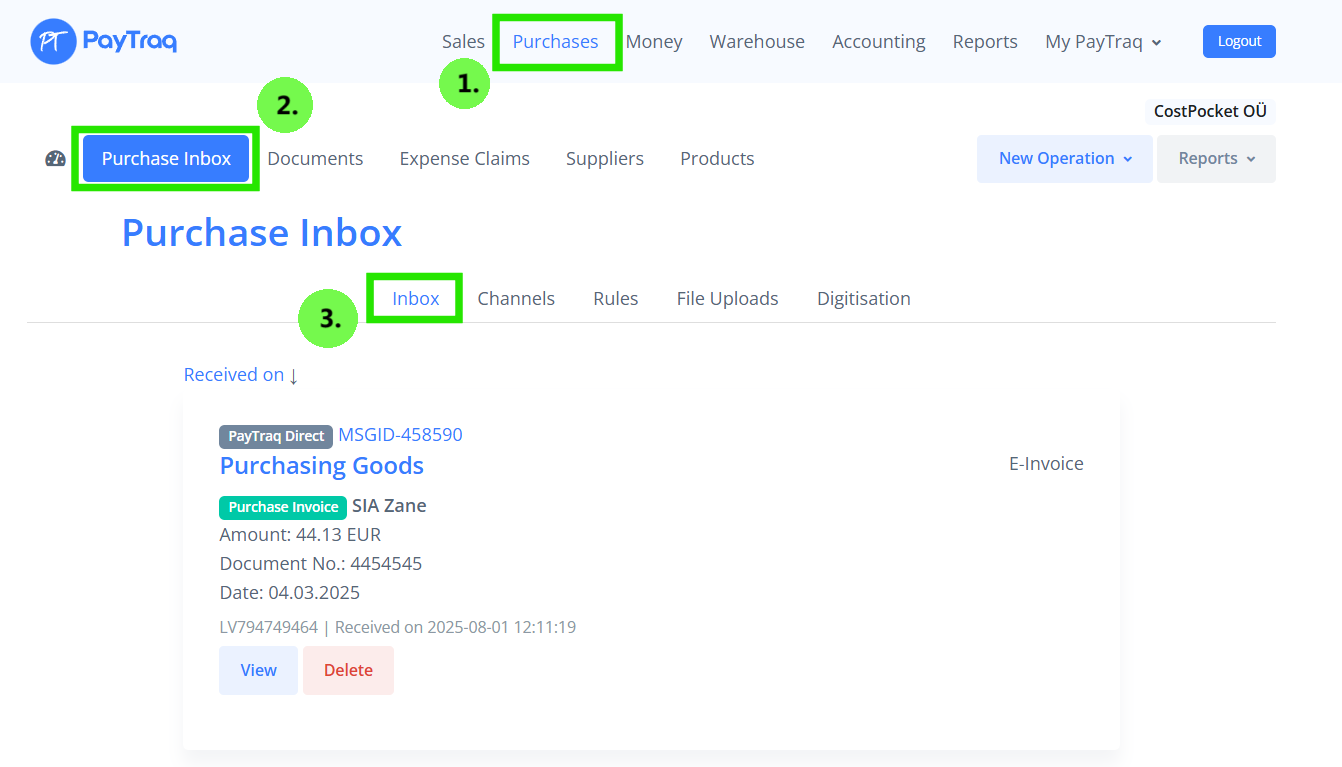
All incoming documents are available for processing in Purchases > Purchase Inbox > Inbox.
Optional: map expense types to accounts
Map CostPocket expense categories to PayTraq accounts under Purchases > Purchase Inbox > Rules. Name each rule exactly as the category value passed in the XML as costType. Available values: transport, car, businessCost, otherCost, representationCost.
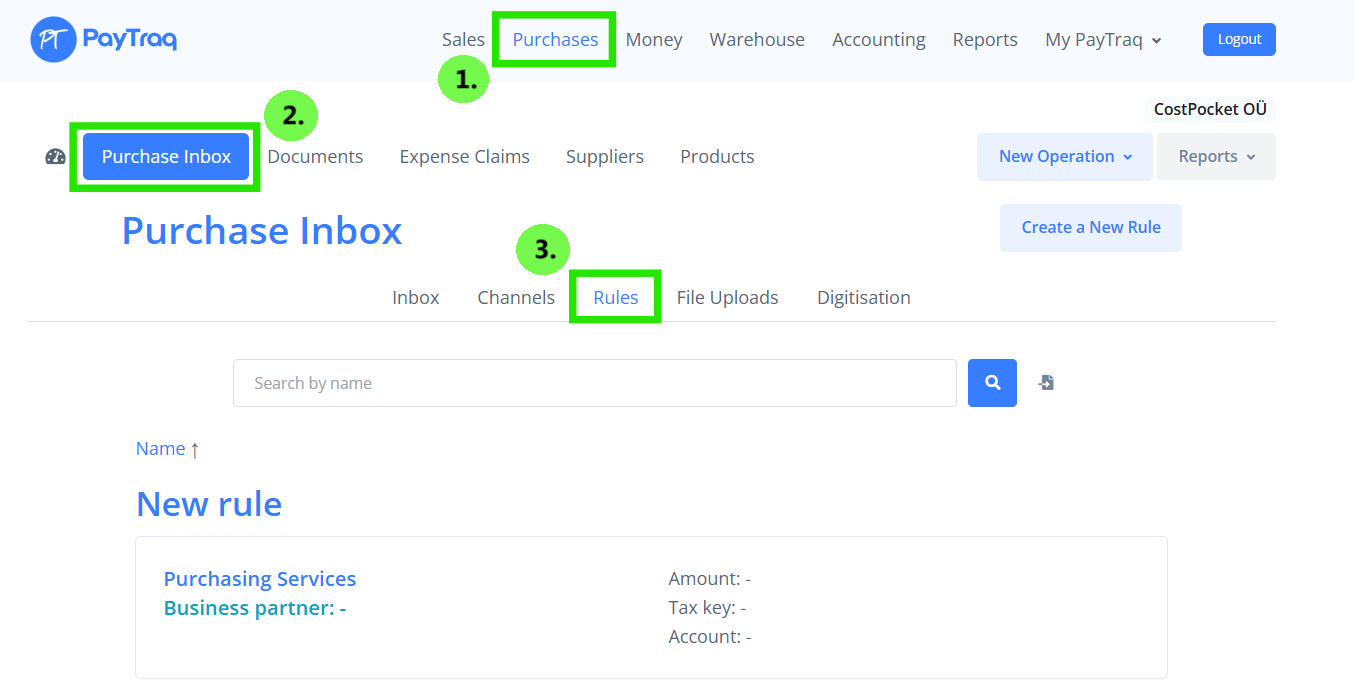
[Image alt text] "Purchase Inbox rules in PayTraq mapping CostPocket expense categories to accounts"
Frequently asked questions
Do I need the mapping rules? No, they're optional, but they save the accountant from assigning an expense account to every document manually.
Which address goes into CostPocket? The email address of PayTraq's Inbox channel (from Purchases > Purchase Inbox > Channels), not your login email.